The Andersen 400 Series window installation guide provides detailed instructions for a successful setup, ensuring durability and energy efficiency while offering expert tips for a flawless process.
Overview of the Andersen 400 Series Windows
The Andersen 400 Series windows are designed for easy installation, offering durability and low-maintenance performance. Featuring Perma-Shield exterior cladding, these windows provide weather resistance and energy efficiency. They are suitable for replacement, remodel, or new construction projects. The series includes casement, awning, and double-hung options, ensuring versatility for various architectural styles. Customizable to fit specific needs, the 400 Series combines functionality with aesthetic appeal, supported by detailed installation guides for a seamless setup process.
Importance of Proper Installation
Proper installation of Andersen 400 Series windows is crucial for ensuring durability, energy efficiency, and weather resistance. Improper installation can lead to water intrusion, air leaks, and structural issues. Following Andersen’s installation guidelines guarantees a secure fit, optimal performance, and long-term reliability. Correct techniques also ensure safety, preventing potential hazards like window malfunction or damage. Adhering to the instructions is essential for maintaining the product’s warranty and overall satisfaction with the installation. Proper installation ensures years of trouble-free operation and enhances your home’s comfort and value.

Preparation for Installation
Ensure all tools and materials are ready, and the site is clear and safe. Follow safety guidelines for ladders and scaffolding, and prepare the rough opening accurately.
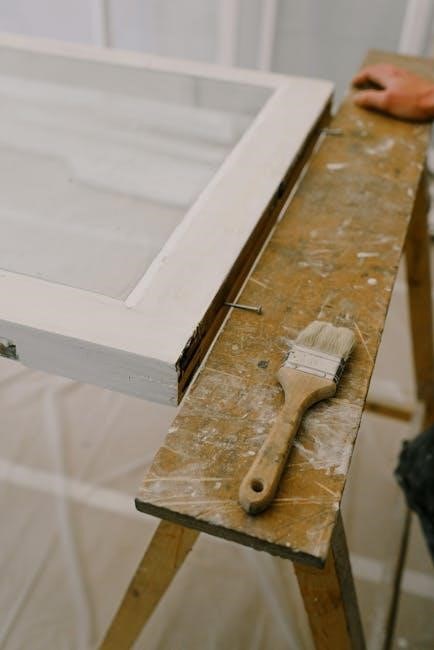
Tools and Materials Required
Essential tools include a level, tape measure, drill, screwdriver, utility knife, and shims. Materials needed are weatherproof sealants, flashing tape, and installation screws. Safety gear like gloves and goggles is recommended. Ensure all items are readily available to streamline the process. Refer to Andersen’s official manual for specific requirements tailored to your window model and installation scenario.
Site Preparation and Safety Precautions
Clear the installation area of debris and ensure a clean, stable workspace. Wear safety gear, including gloves and goggles. Follow ladder and scaffolding safety guidelines to prevent accidents. Ensure the window is supported at all times until fully secured. Properly install flashing to prevent water intrusion; Refer to Andersen’s manual for specific safety measures tailored to your installation scenario.

Installing the Window Frame
Ensure the window frame is level and plumb. Shim as needed for proper alignment. Secure the frame using installation clips or screws. Wear safety gear like gloves and goggles for protection.
Preparing the Rough Opening
Ensure the rough opening matches the window dimensions, cleaning debris for proper fit. Verify the opening is square, level, and plumb. Check for any obstructions or rot. Shim as needed to align the frame correctly. Secure the window temporarily to maintain stability during installation. Follow safety guidelines, such as wearing gloves and ensuring proper support to avoid accidents. Proper preparation ensures a stable and secure window frame installation.
Securing the Window Frame
Fasten the window frame using the provided screws or recommended fasteners, ensuring they are evenly spaced and tight. Start from the center and work outward to prevent warping. Use shims to maintain level and plumb alignment. Tighten all screws firmly but avoid overtightening, which could damage the frame. Ensure the flanges are securely attached and sealed for weatherproofing. Proper fastening guarantees stability and prevents future shifting or leaks.
Installing the Sash and Hardware
Install the sash by carefully lifting and positioning it into the frame, ensuring proper alignment with the hardware. Attach all handles and locks securely for smooth operation.
Handling and Positioning the Sash
Handle the sash carefully to avoid damage. Lift and position it into the frame, ensuring proper alignment with the window opening. Check wall thickness to confirm correct positioning; Use support until fully secured. Follow Andersen’s guidelines for sash installation to ensure smooth operation and prevent misalignment. Proper positioning is crucial for functionality and energy efficiency, aligning with the frame’s hardware seamlessly for optimal performance.
Attaching Hardware and Ensuring Proper Functionality
Attach hardware securely to ensure smooth operation. Check sash alignment and functionality after installation. Properly fasten hinges and handles, ensuring they fit snugly. Use shims to adjust alignment if necessary. Refer to Andersen’s manual for specific hardware requirements. Test functionality repeatedly to confirm correct operation. Address any issues promptly to avoid long-term problems, ensuring your Andersen 400 Series window performs optimally and maintains its durability over time.

Flashing and Sealing
Apply flashing to prevent water intrusion, ensuring a weather-tight seal. Securely affix flashing tape around the window frame, starting from the bottom and overlapping sides and top. Seal gaps with a bead of compatible sealant, ensuring even application and full drying before exposure to moisture. Follow Andersen’s guidelines for materials and application to maintain warranty and performance.
Applying Flashing to Prevent Water Intrusion
Begin by preparing the window opening, ensuring it’s clean and free of debris. Measure and cut the flashing tape to size, allowing extra on each side for full coverage. Start applying the flashing from the bottom, pressing firmly to ensure adhesion. Smooth out any uneven areas beforehand and overlap at corners for a tight seal. Use Andersen-recommended materials to prevent chemical reactions. Apply weatherproof sealant around edges to fill gaps, avoiding excess. For multiple windows, flash each individually. Check for compatibility with Perma-Shield cladding and refer to Andersen’s diagrams or videos for best practices. Inspect the flashing for gaps and test with water to ensure no leaks, ensuring durability and water-tightness.
Sealing Gaps for Weatherproofing
Apply weatherproof sealant or backer rod around the window frame to fill gaps between the frame and the rough opening. Cut the backer rod to size and press it firmly into place. Ensure compatibility with Andersen’s Perma-Shield cladding. Use a foam gun for precise application, avoiding excessive sealant. Smooth out any uneven areas with a damp cloth. Allow the sealant to cure fully before exposing the window to moisture. This ensures long-term protection against air leaks and water intrusion.

Final Adjustments and Inspection
Ensure the window is level, aligned, and functions properly. Inspect all seals for weatherproofing integrity. Contact Andersen support if issues arise.
Aligning and Leveling the Window
Use shims to adjust the window frame, ensuring it is perfectly level and aligned. Check both horizontal and vertical alignment using a spirit level. Gently tap shims into place to avoid damaging the frame. Once aligned, secure the window firmly. Proper leveling ensures smooth operation and prevents air leaks. Refer to the manual for detailed steps or contact Andersen support for assistance if needed.
Inspecting for Proper Fit and Function
After installation, inspect the window for proper fit and function. Ensure all sashes operate smoothly and weatherproofing is effective. Check for any gaps or misalignment. Verify that all hardware functions correctly and test window features like locking mechanisms. Consult the Andersen manual for detailed inspection guidance to ensure long-term performance and durability of your Andersen 400 Series window installation.

Troubleshooting Common Issues
Common issues during installation include frame misalignment, hardware malfunction, or improper sealing. Refer to Andersen’s troubleshooting guide for solutions to ensure optimal window performance and longevity.
Addressing Frame Misalignment
Frame misalignment can occur due to improper shimming or uneven surfaces. To fix, check the window frame for plumb and level, then adjust shims as needed. Ensure all fasteners are securely tightened but avoid overtightening, which may warp the frame. If issues persist, consult Andersen’s official installation manual or contact their customer support for professional guidance to achieve proper alignment and functionality.
Resolving Hardware Malfunction
Hardware issues, such as stuck handles or misaligned hinges, can hinder window functionality. Lubricate moving parts with silicone-based spray and ensure all screws are tightened properly without over-tightening. If problems persist, refer to Andersen’s troubleshooting guide or contact their customer support for assistance. Proper maintenance and timely repairs are crucial to uphold the window’s performance and longevity.

Maintenance and Care
Regular cleaning with mild detergent and water keeps Andersen 400 Series windows pristine. Lubricate hinges and locks annually for smooth operation. Inspect weatherstripping and hardware for wear. Proper maintenance ensures longevity and optimal performance of the Perma-Shield cladding.
Cleaning and Lubricating Moving Parts
Clean Andersen 400 Series windows with a mild detergent and water, using a soft cloth to avoid scratches. Lubricate hinges and locks annually with a silicone-based product for smooth operation. Regularly inspect weatherstripping and hardware for wear. Proper cleaning and lubrication ensure optimal functionality and longevity of the window components, maintaining the Perma-Shield cladding’s performance and energy efficiency over time.
Inspecting for Long-Term Durability
Regularly inspect the Andersen 400 Series windows for signs of wear, ensuring weatherstripping and seals remain intact. Check the Perma-Shield cladding for damage and verify proper drainage function. Inspect hardware for corrosion and ensure all components are securely fastened. Address any issues promptly to maintain energy efficiency and prevent water intrusion. Annual professional inspections are recommended to ensure long-term performance and durability of the window system.
Additional Resources
Access Andersen’s official guides and manuals for detailed installation and maintenance instructions. Contact Andersen’s customer support at 1-888-888-7020 for assistance or visit their Help Center online.
Accessing Andersen’s Official Guides and Manuals
Visit Andersen’s official website to download comprehensive installation and maintenance manuals for the 400 Series. These resources include detailed instructions, diagrams, and troubleshooting tips. Ensure you use the correct guides specific to your product and construction type for accurate installation. Additionally, the website offers customized installation tools and animated video guides to simplify the process. Always refer to the latest versions for the most up-to-date information and support.

Contacting Andersen Customer Support
For assistance with your Andersen 400 Series installation, contact their customer support team at 1-888-888-7020 (Monday-Friday, 7 a.m. to 7 p.m. CT) or visit their Help Center. Their experts can address installation questions, provide troubleshooting, and guide you through complex steps. Additionally, the support team offers technical guidance and warranty information to ensure your Andersen products are installed and maintained correctly. Reach out for personalized support tailored to your installation needs.


0 Comments