Mikuni carburetors are renowned for their reliability and performance in various engines. Proper tuning ensures optimal fuel efficiency and power delivery. This guide provides a comprehensive overview of Mikuni carburetors, focusing on key components, tuning procedures, and troubleshooting techniques to enhance your engine’s performance.
1.1 Overview of Mikuni Carburetors
Mikuni carburetors are widely recognized for their durability and performance in powering engines. Commonly used in motorcycles, they offer precise fuel delivery, making them a popular choice for enthusiasts. Their design ensures smooth operation across various RPM ranges, from idle to high-speed performance. With models like the VM28 and TM40/HS40, Mikuni carbs cater to diverse engine needs. Proper tuning is essential to maintain optimal performance, as outlined in manuals and guides available online. Understanding their functionality is key to maximizing efficiency and power output.
1.2 Importance of Proper Tuning
Proper tuning of Mikuni carburetors is crucial for achieving optimal engine performance, fuel efficiency, and reliability. Incorrect jetting or misadjusted components can lead to poor idle, sluggish acceleration, and reduced engine longevity. Tuning ensures the right fuel-to-air mixture at all RPM levels, preventing lean or rich conditions that can damage the engine. Regular adjustments also account for changes in altitude, temperature, or engine modifications. Following precise tuning procedures, as outlined in manuals, is essential for maximizing power output and maintaining engine health.
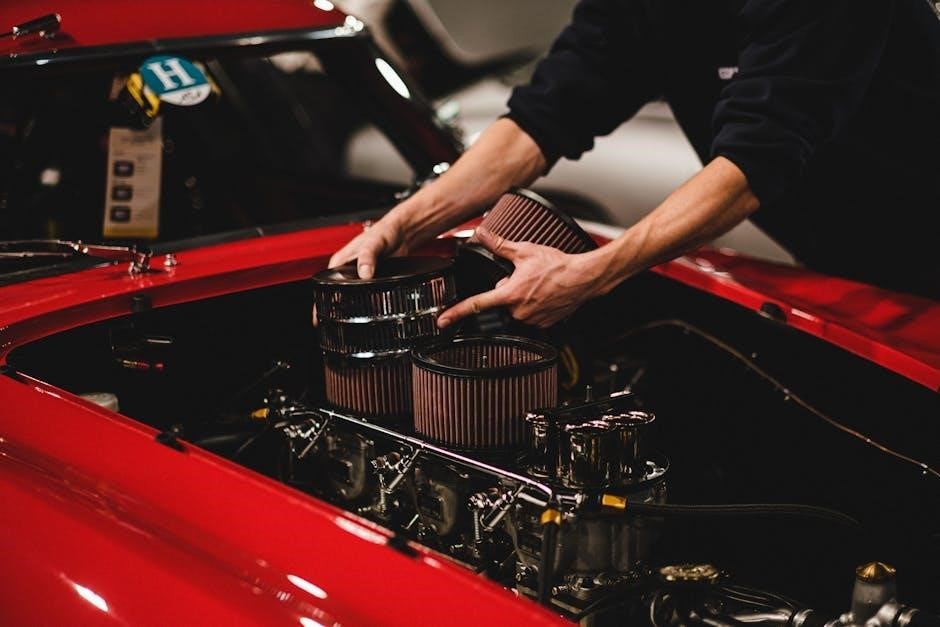
Understanding Mikuni Carburetor Components
Mikuni carburetors consist of key components like pilot jets, main jets, needle jets, and throttle slides. Each part plays a vital role in delivering the correct fuel mixture.
2.1 Key Parts of the Mikuni Carb
The Mikuni carburetor comprises essential components such as the pilot jet, main jet, needle jet, and throttle slide. The pilot jet controls fuel flow at idle, while the main jet regulates fuel delivery at high RPM. The needle jet manages the mid-range fuel flow, and the throttle slide adjusts airflow. These parts work together to ensure proper fuel-air mixture delivery, critical for optimal engine performance and smooth operation across various speed ranges.
2.2 Function of Each Component
The pilot jet delivers fuel at idle and low-speed conditions, ensuring smooth engine operation. The main jet regulates fuel flow during high RPM, impacting top-end performance. The needle jet controls the mid-range fuel delivery, affecting throttle response. The throttle slide adjusts airflow based on throttle input, influencing overall performance. Each component works harmoniously to maintain the optimal fuel-air mixture, critical for engine efficiency, power delivery, and smooth transition across all operating ranges.

Preliminary Checks Before Tuning
Ensure proper float height, check for vacuum leaks, and synchronize carbs before tuning begins. These preliminary checks are essential for ensuring accurate adjustments and optimal performance.
3.1 Ensuring Proper Carburetor Synchronization
Proper carburetor synchronization ensures balanced fuel delivery across all cylinders, promoting smooth engine operation. Use a manometer to measure vacuum levels at each carb mouth. Adjust the mixture screws or synchronization caps to equalize the readings. Misalignment can cause uneven engine performance or poor idle. Double-check synchronization at idle and mid-RPM ranges. Ensure all carbs draw vacuum evenly for optimal tuning results. This step is crucial before proceeding with jetting adjustments or fine-tuning the idle mixture.
3.2 Checking for Vacuum Leaks
Vacuum leaks disrupt the air-fuel mixture by introducing excess air, leading to poor engine performance. To check for leaks, use a vacuum gauge to measure pressure at the carburetor mouth; low readings indicate leaks. Alternatively, spray soapy water around gaskets and connections while the engine runs—bubbles will form at leak sites. Ensure carbs are synchronized before testing. Inspect all connections and gaskets, and consult a manual or online forums for specific guidance. Addressing leaks is crucial for proper tuning and engine efficiency.
3.3 Verifying Float Height and Function
Proper float height ensures the carburetor maintains the correct fuel level, crucial for smooth engine operation. To check, gently turn the carburetor upside down and measure the distance from the float to the carb body; it should match the manufacturer’s specification (typically around 19mm ±2mm). If incorrect, adjust the float tang gently. A malfunctioning float can cause poor idle or running issues. Clean the float bowl and inspect for debris or damage. Accurate float height and function are vital for reliable performance and proper fuel delivery throughout the rpm range.

Step-by-Step Tuning Process
Start with the pilot jet for idle, adjust the main jet for mid-range, fine-tune the needle jet, and finish with the throttle slide for smooth transitions.
4.1 Adjusting the Pilot Jet
The pilot jet controls fuel flow at idle and during low-speed operation. Start by setting the pilot jet to the manufacturer’s recommended specification. Ensure the carburetor is clean and free of debris. Adjust the pilot screw clockwise to reduce fuel flow or counterclockwise to increase it. Test the engine at idle and gradually increase the throttle to ensure smooth transition. If the engine hesitates or runs rough, adjust the pilot jet accordingly. Proper adjustment ensures stable idle and seamless low-end performance.
4.2 Setting the Main Jet
The main jet regulates fuel flow at high RPM, ensuring proper combustion. Start by selecting the main jet size based on the manufacturer’s specifications or through spark plug testing. Install the jet and test the engine under load at high RPM. If the engine runs lean (spark plug appears white), increase the jet size. If it runs rich (spark plug appears dark), decrease the size. Proper main jet adjustment ensures maximum power and efficiency at higher speeds without damaging the engine.
4.3 Fine-Tuning the Needle Jet
The needle jet fine-tunes the fuel mixture at mid-range RPM. Start by testing the engine under varying throttle conditions to identify lean or rich spots. A lean condition may cause hesitation, while a rich condition can result in poor efficiency. Adjust the needle jet size or clip position to achieve a smooth, consistent power delivery. Use spark plug coloration as a reference—light brown indicates optimal combustion. Fine-tuning requires patience and incremental adjustments to ensure proper fueling across the entire RPM range, enhancing overall engine performance and responsiveness.
4.4 Adjusting the Throttle Slide
Adjusting the throttle slide is crucial for optimizing airflow and fuel delivery at various throttle positions. Start by ensuring the slide moves smoothly without binding. Fine-tune the slide’s cut-away size to balance low-end and mid-range performance. A larger cut-away enriches the mixture, while a smaller one leans it out. Test the engine under load to identify any hesitation or richness. Adjustments should be incremental, checking performance after each change. Proper throttle slide tuning ensures seamless throttle response and consistent power delivery across the RPM range, enhancing overall engine efficiency and ride quality.
Troubleshooting Common Issues
Common issues with Mikuni carbs include poor idle, hesitation, and rich or lean conditions. Diagnosing these problems involves checking jetting, throttle response, and synchronization to ensure proper function.
5.1 Identifying Lean and Rich Conditions
Lean conditions occur when there’s too much air and not enough fuel, causing symptoms like backfiring, overheating, or a hesitation during acceleration. Rich conditions, conversely, happen when excess fuel isn’t fully burned, leading to poor idle, decreased performance, or black smoke from the exhaust. Both issues often stem from improper jetting or needle settings. Diagnosing these problems involves observing engine behavior, checking spark plugs for color changes, and testing throttle response to determine whether adjustments to the pilot, main, or needle jets are needed for proper fuel mixture balance.
5.2 Diagnosing Poor Idle and Transition
Poor idle and transition issues often stem from improper pilot jet sizing or incorrect float levels. Symptoms include stumbling, hesitation, or rough running when moving from idle to mid-throttle. Check the pilot jet for blockages and ensure the float height is within specifications. Adjust or replace the pilot jet as needed to smooth out the idle and transition. Additionally, inspect the throttle slide and needle jet for proper alignment, as misalignment can exacerbate these issues. Proper diagnosis ensures a seamless power delivery across the entire throttle range.

Maintenance and Best Practices
Regularly clean and inspect carburetor components to ensure optimal performance. Store disassembled parts in a clean, dry environment and use genuine Mikuni replacement parts for reliability.
6.1 Regular Cleaning and Inspection
Regular cleaning and inspection are crucial for maintaining Mikuni carburetors. Use a carburetor cleaner to remove dirt and grime from all components, including jets and passages. Inspect for worn or damaged parts, such as gaskets, seals, and needle valves, and replace them as needed. Check the float height and ensure proper alignment of all components. Clean or replace the air filter to prevent debris from entering the carburetor. Regular maintenance ensures optimal performance and prevents issues like poor idle or uneven throttle response.
6.2 Storage and Reassembly Tips
When storing Mikuni carburetors, clean and dry them thoroughly to prevent corrosion. Use silica gel packets to absorb moisture and store in an airtight container. Label all parts to ensure easy reassembly. During reassembly, refer to the manual for proper torque specifications and alignment. Avoid mixing old and new gaskets or seals. Double-check all connections for tightness and inspect for any damage. After reassembly, test the carburetor to ensure proper function before installing it back on the engine.


0 Comments